WebMeeting FAQ
Zoom
Any active UA account can claim a Zoom account:
- Go to alaska.zoom.us
- Click the Sign-in button to configure your account
- Sign in using your UA credentials
- Follow any prompts to set up your account
Once claimed, you can always get to your account configuration and access meetings at alaska.zoom.us.
You can log into your account either directly at alaska.zoom.us or by downloading the Zoom app. When logging into the app, make sure to select the SSO option. From there, enter alaska .zoom.us.

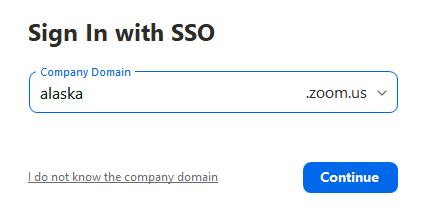
In either case, the UA Zoom sign-in page will open in your preferred browser. Log in with your UA credentials, then follow the MFA prompt.
Yes! Once you've claimed your Zoom account, you can reserve Live Training from Zoom at zoom.us/livetraining. Alternatively, you can watch pre-recorded sessions at any time at the Zoom Help Center.
You can also check out Zoom's Help Center at support.zoom.us. Here you can find tutorials, status updates, and tips for much of Zoom's functionality.
If you already have a Zoom account associated with your UA email, you should still claim your account. Once you have signed in, you will be asked to migrate your account to the UA domain.
Please note that if you have any paid features, these will not be migrated to the UA domain. If you have any questions, please contact the VCS office.
The Zoom app is the preferred option for hosting and joining Zoom meetings. The app is more stable and enables additional features, such as Virtual Backgrounds. Web access through your browser is simple and quick but comes with some limits to functionality.
You can find installers for all supported devices on the Zoom Installers page.
Once you are in a meeting, most of the controls are at the bottom of the window. Here's a quick reference guide for what they all do:
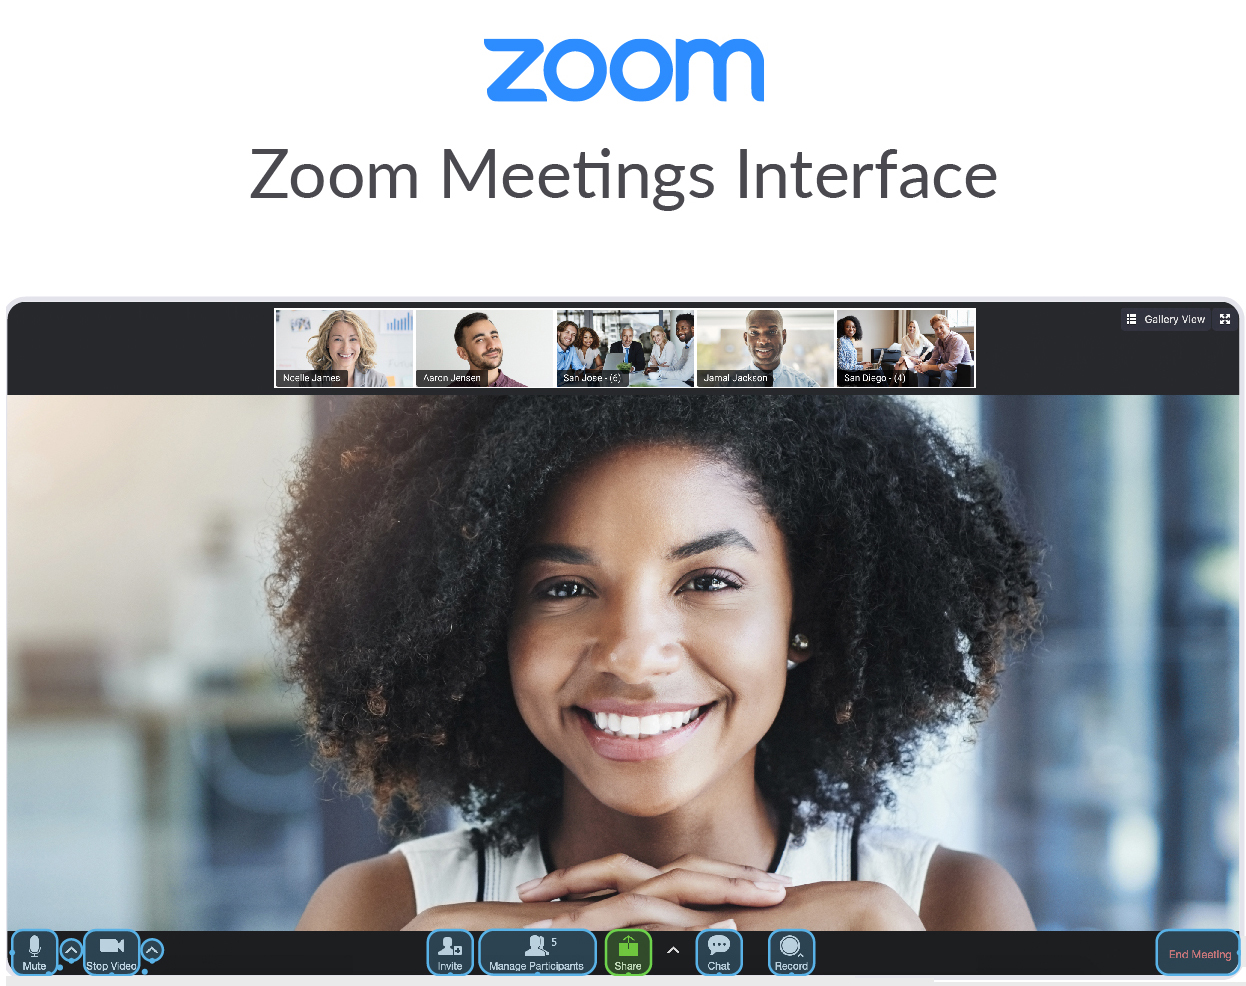
Modified from an image provided by OIT: https://www.alaska.edu/files/oit/ZoomMeetings-Interface-Web.jpg
Buttons (from left to right)
| Button | Function |
|---|---|
| Mute/Unmute & Menu: Mute or unmute your microphone. Click the arrow to adjust or test your audio settings | |
| Start/Stop Video & Menu: Start or stop your camera's video. Click the arrow to adjust video settings and virtual background. | |
| Invite: Send invitations by email, organization (Contacts), or room system. | |
| Manage Participants: The host can manage other participants' audio, camera, sharing privileges, and status. | |
| Share & Settings: Share your desktop, programs, or other content. Click the arrow to adjust your sharing settings. | |
| Chat: Chat in a meeting with the room or with individuals. | |
| Record: Record the meeting either to your computer or to Zoom's cloud storage. Please note that cloud recordings are maintained for up to two years. | |
| End Meeting: Exit the meeting. The host can also end the meeting for all participants. |
Some other features you may see
| Button | Function |
|---|---|
| Polls: Send questions to your participants and view the results. | |
| Closed Captions: Live subtitles written by a participant or 3rd party service. Click the arrow for options and settings. | |
| Breakout Rooms: Split the participants into independent small groups. You can also manage content and membership. |
You can grant other accounts the ability to schedule meetings for you ahead of time. First, make sure both you and the scheduler have claimed a Zoom account at alaska.zoom.us.
- Sign in at alaska.zoom.us
- Access Settings from the left navigation menu
- On the Meeting tab, go to Schedule Privilege
- Click the + button next to Assign scheduling privilege to
- Enter the email address of your scheduler
- Click the Assign button
From this point on, your scheduler can create meetings on your behalf using the Schedule tool.
To schedule a meeting on behalf of someone else, first sign into your Zoom account at alaska.zoom.us.
- Click Schedule a Meeting in the upper right
- Fill in meeting descriptors (topic, duration, date, etc.)
- Select the drop-down menu in the Schedule for the section
- Choose the email address you are scheduling the meeting for
- Click Save
- Copy the invitation and send it to attendees
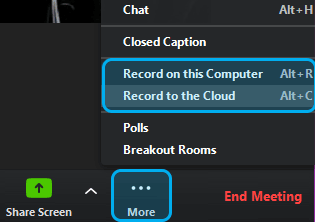
As the meeting Host, Zoom provides two methods to record a meeting: Local or Cloud recording. If you don't see either of these options when hosting a meeting, check your settings at alaska.zoom.us.
To start the recording:
- Open up the Zoom meeting.
- From the bottom menu options, click the Recording button.
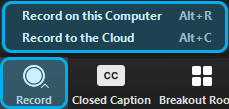
- If prompted, select where you'd like to record: Local or Cloud.
When you start a recording, you have the option of recording either:
- Record to the Cloud: This saves the recording to your Zoom account. Please note that cloud recordings are maintained for up to two years. You can log into alaska.zoom.us to see how long the recording will be available and to download it to a permanent location.
- Record to this Computer: this saves the recording to a local directory. You will have 3 files: Mp4 audio/video, M4a audio, and M3u organizer.
To access a cloud recording:
- Log in at alaska.zoom.us
- From the left menu, select Recordings
- From the top menu, click Cloud Recordings if not already selected
- Search the appropriate time frame for your meeting (it defaults to 1 month)
- Click the Topic link for your meeting
- You can either:
- Play the meeting in-browser
- Download the files
- Copy a shareable link
- Please note that recordings in cloud storage are only maintained for two years. Recordings can be saved locally or downloaded from cloud storage during that time frame.
To access a local recording:
- Open the Zoom app
- Click the Meetings button at the bottom
- Click the Recorded button at the top
- Locate your meeting from the list
- Using the buttons on the right you can:
- Open your meeting location
- Play Video (and audio)
- Play Audio only (no video)
- Delete (this is permanent!)
To change where your local recordings are saved:
- Open the Zoom app (this can't be done from the web)
- Click the Gear icon in the upper-right to open your Settings menu
- From the left menu, select Recording
- The location field shows where you are currently saving your local recordings
- Click the Open button to access the file directly
- Click the Change button to browse for a new folder
When your instructor has recorded a meeting through the Blackboard tool, you can access it from the course menu.
To access a cloud recording:
- Open Zoom Webmeeting on the left navigation menu on your course homesite
- Click the Cloud Recordings tab
- Click on the recording of the meeting you wish to view. By default, meetings are sorted by date.
- Click the Play button to view the recording in-browser
Both the Host and Scheduler will receive an email notification when the recording has been processed. While both can share the recording, it will only show up the listed recordings for the Host.
A local recording can always be placed in a location easily accessible by multiple people, such as a fileshare.
Zoom allows you to set up a static image that displays instead of an inactive camera. To set this up:
- Log in at alaska.zoom.us
- Access your Profile
- Click the Change link under the blank profile icon to the left of Your Name
- Click Upload in the lower left and select the image from your computer, noting the limited size of 2MB
- Click Save in the lower right corner
Starting in your next meeting, your profile image will appear whenever your camera is inactive.
Zoom provides a wide variety of tools to allow you to customize how you want to make your meetings secure. These settings can be found in one of two places, during the initial scheduling of the meeting, and in the Settings tab at alaska.zoom.us. We have listed these settings and what they do below to best help you find what kind of security you need for your meeting:
- Encryption - All Zoom traffic is encrypted. For more information, see The Facts Around Zoom and Encryption for Meetings/Webinars.
- Waiting Rooms - This feature ensures that all participants who attempt to join the room must be manually granted access. No one gets in without a Host's approval.
- Join before Host - If this feature is OFF, then no one can access the room until the Host is ready.
- Lock the Meeting - Once all participants have joined the meeting, the Host can lock the room to prevent anyone else from joining.
- Recording control - Hosts can always record meetings, but can control what participants can do with those recordings, such as view, record, and even download.
- Only Authenticated Users - To prevent random attendees, select the "Only authenticated users can join meetings" option to limit unexpected visitors.
- Meeting IDs - Each scheduled meeting has a unique ID for each meeting. This expires after 30 days to limit access afterward. Instant meetings can use a unique ID or your Personal Meeting ID. Please note that once your PMI is given out, that meeting can always be accessed.
- Microphone and Camera Control - The Host can mute microphones and disable cameras for participants, either universally or selectively.
- Password Required - Limit access to any meeting behind a password. Invited participants will automatically receive the password.
- Screen Sharing & Whiteboard - Limit screen sharing to only the Host, or open it to all participants.
Zoom has many recommendations for How to Keep Uninvited Guests Out of Your Zoom Event.
In Zoom, you will need to follow the link provided by the host or instructor. Then, you will be prompted to download the Zoom app or to run the meeting in the browser. This happens every time you join a meeting.
If this is your first time joining a Zoom meeting, you may need to manually choose to access it via the Zoom app.
Zoom requires a stable internet connection to function. That connection needs to be a minimum of 600kbps up/down. They recommend a broadband connection, wired or wireless (3G or 4G/LTE). You can see more about the official recommendation on the Zoom system requirements page.
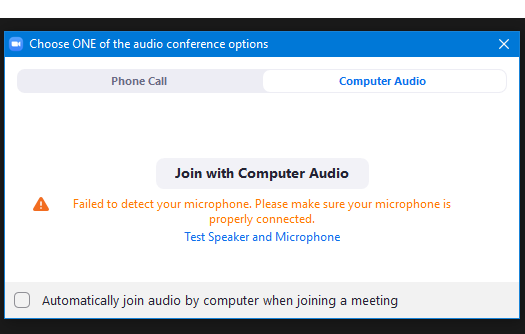
When accessing any Zoom meeting, you'll be prompted to select whether to use Computer Audio or Phone Call. If you didn't select Join with Computer Audio, Zoom will not be able to use your microphone. If you close this window, you can get back to it by clicking the Join Audio button in the lower left corner.
If you need to make sure things are working, or if you encounter trouble being heard after connecting, click the arrow next to the Mute button and select Test Speaker and Microphone. The wizard will take you through selecting and testing your speakers and microphone.
If you're accessing Zoom in a browser, make sure to Allow microphone access when prompted. If you don't, you'll need to go through your browser's settings to allow microphone access.
Please note: if your computer doesn't recognize any microphone input at all, or gives you the error "Failed to detect your microphone, check your OS settings. In Windows 10, this is located in Settings > Privacy > App permissions: Microphone. Make sure "Allow apps to access your microphone" is set to ON.
To set up your camera in Zoom from within a meeting, click the up arrow by the Camera icon, and select Video Settings (you can also get to this menu from your App profile). In the Camera dropdown menu, select your preferred camera. A preview window will display the camera output above. Simply click the Camera icon in the meeting to connect this camera to the meeting.
If the camera isn't recognized, make sure any external cables are plugged in, or check your OS settings. In Windows 10, this is located in Settings > Privacy > App permissions: Camera. Make sure "Allow apps to access your camera" is set to ON.
Zoom cannot present content inside the meeting. Instead, participants can click the Share Screen button to select either a full display or a specific application to share. This will then be visible to all other participants. The Host can manage this ability.
If you're having trouble connecting to your webmeeting, check if your host or instructor allows you to call in by phone. Most Zoom rooms are automatically configured with a call-in number, which you can access by clicking the arrow next to the microphone icon, selecting "Switch to Phone Audio...", and following the prompts.
Alternatively, your instructor or meeting host can provide a dial-in number, meeting ID, and (optionally) meeting passcode for phone-only access.
From the link on your Blackboard Course site, you will be presented with the Zoom controls. Instructors will have scheduled meetings that will be visible in Upcoming Meetings. Click the Join button to the right of the meeting to enter. You can then choose either to Open in the Zoom app or start from your browser. You will then automatically be placed in the meeting, and be prompted for audio setup.
Hosts (and Instructors) have several options to secure Zoom sessions to prevent access by non-students. If you join the room and see a message that says "Please wait, the meeting host will let you in soon" or "Please wait for the host to start this meeting", then your session is configured to make it harder for unnecessary individuals to access your course. Just wait for the host to get ready before they start the meeting.
Zoom allows you to set up a static image that displays instead of an inactive camera. To set this up:
- Log in at alaska.zoom.us
- Access your Profile
- Click the Change link under the blank profile icon to the left of Your Name
- Click Upload in the lower left and select the image from your computer, noting the limited size of 2MB
- Click Save in the lower right corner
Starting in your next meeting, your profile image will appear whenever your camera is inactive.
Zoom limits each individual to only be able to host one meeting at a time. However, you can use the app to join additional meetings hosted by other individuals. To turn off (or back on) the ability to join simultaneous meetings:
- Log in at alaska.zoom.us
- Access your Settings
- In the In Meeting (Basic) section, locate the Join different meetings simultaneously on the desktop
- Click the button on the right to toggle this function On/Off
Please note:
- To access additional meetings after the first, you will need to use the web interface at alaska.zoom.us
- Your microphone and camera can only be active in one meeting at a time. When you want to be seen and heard, make sure to activate your audio and/or camera in the correct meeting.
All Zoom meetings require a Host. If the host is not present and authenticated, participants will be prompted to claim the session by entering the Host Key. Only the correct Host (or Alternative Hosts) can use their Host Key to claim the meeting.
If you don't know your Host Key, log in at alaska.zoom.us and access your Profile. Your Host Key will be listed at the bottom of the list.