Link Course Sections
- Blackboard
Last modified: December 22, 2023
If you are teaching multiple sections of the same course, you can save yourself time by linking the courses together. This way you only post information once for all sections.
You are viewing instructions for Original view in Blackboard (the current UAS default).
If you have elected to use Ultra, go to Ultra course view on linking courses instead.General Information about Course Linking
You can link course sections together using the "UAS Online Course Linker" tool. This is found in the Control Panel under Course Tools and alphabetically as "UAS Course Linker". Once two sections are linked, the course list will roll over and all your students will be in the main course site and their grades will be in that gradebook. This is the only site you will edit. Course Materials and Grades will NOT be copied over if you unlink the courses later. You should only unlink courses before the start of the semester if you change your mind because the student's work will not be copied to the unlinked sections.
How it works
If you have several sections of the same course, a separate course site will be created for each. In the figure above, there are three sections. There will be three course names listed on UAS Online and they will be linked to three separate Blackboard Course sites. Many times, the course material you are posting on the course sites will be the same for all three sections. To avoid having to post everything three times, you can link the courses together and have all the students in one course site. This will also put all of the students in the same gradebook.
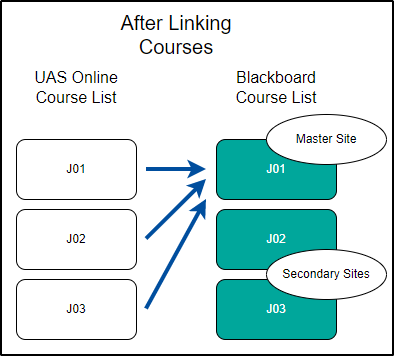
After the courses are linked, the students will see all of their separate sections on their UAS Online course list. You will still see all three section names, but clicking on any one gets you to the "master" course site (J01 in this example) - the one you are going to edit and add content to. The linked courses (J02 and J03) will remain empty and inaccessible (unless you unlink the courses as shown below). Let's call those sites the secondary sites.
Instructions for Linking Courses
- Decide which course will be the master course site (Jo1 in the example above)
- Go the secondary course sites (J02 and J03 in the example above)
- Locate the UAS Course Linker under Course Tools in the navigation pane which takes you to this page:
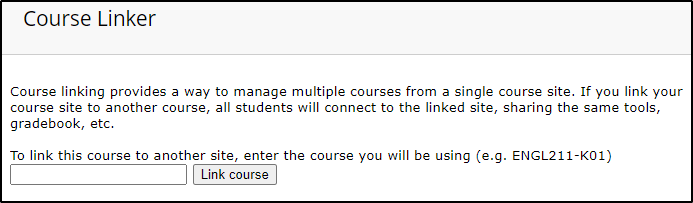
- Enter the full name of the master site. (If you are in J02 or J03, you will enter the name of J01 making it the master site)
- Click “Link Course”
- Repeat for any additional sections you wish to link.
When you return to J02 and J03 after linking, you will be taken to the master site and all of your students should be on the class roster and gradebook. It may take a few minutes for the link to be complete, so don’t panic if you don’t see all of your students immediately.
When students click on their course section, they will be automatically taken to the master course section.
Need to View Linked courses Individually?
After classes are linked, you may find that you want to view them separately at times. You can do this by creating a Smart View for each group of students to help you filter out the groups.
Create a Text Column
In order to label which students belong in each course section, you need to create a "Text" column in your Grade Center.
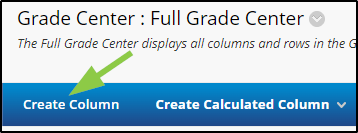
- Go to your Grade Center and use the "Create Column" button to create a new column.
- Name the column "Section" or any other label that works for you and set the Primary Display to "Text". Then click "Submit".

- Give the column zero points (points are required even for "Text" columns).
- Go to Manage>Column Organization and re-order it if you like. For example, you may want the section numbers to be near the student names.
Fill in the Section Labels
- Fill in section labels so that you can differentiate between courses.
Create a Smart View for Each Section
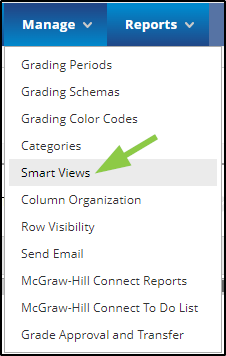
- Go to "Manage" and then "Smart Views".
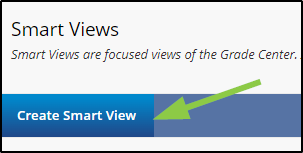
- Click "Create Smart View".
- Name the Smart View.
- Click "Add as Favorite".
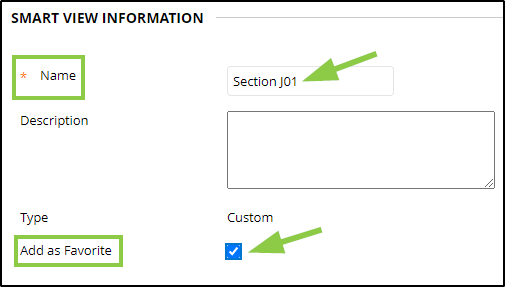
- Scroll down. Check the circle next to "Custom".
- For "Select Criteria" choose "Grade on Section (Text)" where "Section" is the name of the column that was created.
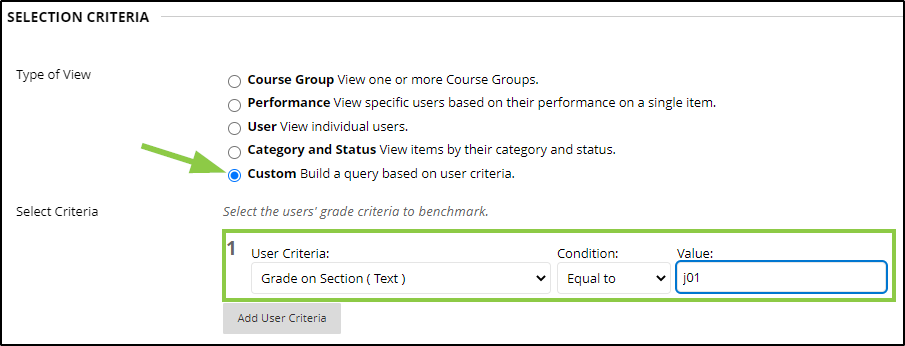
- Set condition "Equal to" and Value "j01" (where that is the label of this particular section)
- Important - Near the bottom change "Filter Results" (Columns to Display in Results" to "All Columns"

- Submit then repeat for each section.
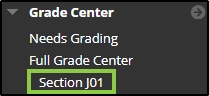
Once you have created a Smart View for each section (and made it a favorite) then the Smart Views will appear under Full Grade Center in the control panel. Clicking on any of these shows only the students in that section.
If not all the grade columns are displayed, then go back and make sure "Filter Results" is set properly.
Unlinking Courses
To unlink course section, go to the UAS Course Linker in the master site and click the course section you wish to unlink.

Just remember that none of the student records will be copied back to the now unlinked secondary sections, so this is not recommended after the start of the semester.