Add and Edit Content
- Blackboard Ultra
Last modified: January 8, 2026
In Blackboard Learn Ultra the "..." menu on any item allows you to edit and delete content. You can move and drag content by "grabbing" it with the 6 dots to the left of the item. The "+" symbol allows you to add or copy content.
Creating content
Any time you want to create content or add to your course, look for the "+" icon in Ultra. You can usually create content right where you want it by clicking that icon and then selecting the type of content you want.
A few recommendations:
- If you are creating a container at the top level of your course, we recommend using a module rather than a folder. A module is just a folder with extra options. Even if you don't use the options for now, this will make it easier in the future if you want to use some of those options!
- If you want to add links to youtube videos, we recommend linking them from a document, rather than directly with the "link" option that way you can use a nice thumbnail rather than the default link icon that Blackboard provides.
- If you want to add a column to your gradebook, you can add an assignment and Blackboard will automatically add a column for you in the gradebook. If you don't want students to submit via Blackboard you can always select "collect submissions offline" in the assignment settings.
- You can also create columns directly in the gradebook by clicking the plus sign between columns, but this won't create a corresponding item in the content area, which can be detrimental to your understanding and that of your students in the future. We recommend the former way so that you have an associated item in the content area.
Edit, Move, or Delete Content in a Blackboard Course
The "..." context menu on each component allows these options:
- Edit (Change Name, Description, Options, Attached files, etc.)
- Delete - delete this component
- View student progress if you have progress tracking turned on (to turn it on, use the menu for it on the left)
The "..." menu at the very top right of all content also allows you to "batch edit" to delete multiple items, change multiple dates/date management, or edit the visibility of multiple items.

Adding videos to Blackboard
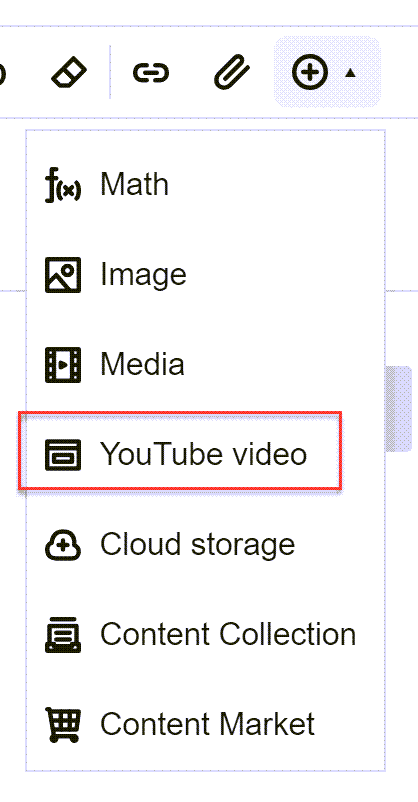
We recommend putting your videos on a "document" page in Ultra for the best student experience. First, navigate to where you want your page of video(s) then select the plus sign to create a document. From here you have a few options .
a) Use the plus sign in the text editor to search for a Youtube video (this will not work for unlisted videos).
b) If your video is unlisted, you can either link to it with the link tool, or you can "add html" to add the following snippet to embed a Youtube video:
<iframe width="420" height="315"
src="https://www.youtube.com/watch?v=sYJWU0gxq2o">
</iframe>
(of course, you'll replace that URL with your own)
c) If you use Microsoft Stream, then from the menu on the right, select Cloud storage and follow the prompts to find your video (you will need to be logged in).
Note on Screenshots
Blackboard Ultra is updated monthly, so the screenshots and videos provided may look a little different from what you see in your course. If a button or menu looks unfamiliar, try locating the most similar option. If something seems out of date, please email CELT so we can update our materials.