Add and edit content
Last modified: November 11, 2025
You can edit, delete and move most types of Blackboard content by using the drop-down menu you'll find next to the Name of that component.
You are viewing instructions for Original view in Blackboard
If you use Ultra, go to Ultra course view on adding and editing content.
Edit, Move, or Delete Content in a Blackboard Course
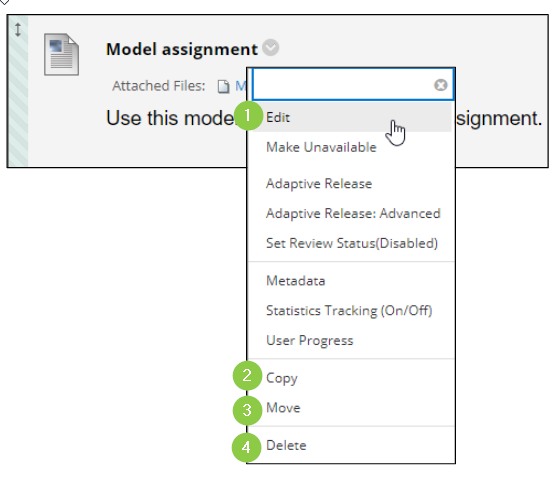
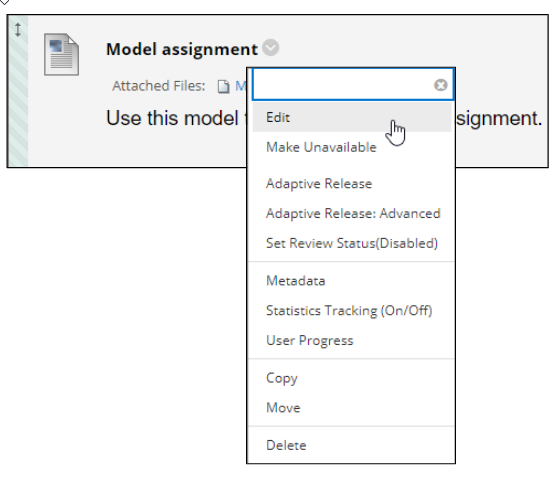
The drop-down menu (accessed by clicking on the downward arrow next to most components) allows these options:
- Edit (Change Name, Description, Options, Attached files, etc.)
- Copy - if allowed, make a copy in another location - you will be given a chance to browse through the course Content Areas and Folders
- Move - if allowed, move to a new location - you will be given a chance to browse through the course Content Areas and Folders
- Delete - delete this component
Exception: You cannot move or copy anything that is linked to the Gradebook. In Blackboard Tests and Assignments (an assessment tool that allows students to submit documents) are automatically linked to the Gradebook. The same can be true of assessments and interactive tools such as discussion boards, blogs and wikis.
If you attempt to move or copy a folder that contains components linked to the gradebook) then you will be warned.
To move a component linked to the gradebook you will need to delete it and re-deploy it in the new location. An alternative is to make a "Course Link" - this lets you put a link in any Content Area or Folder that can re-direct students to any other component in the course. Use with caution and consistency since it can make navigation confusing for students. For example, clearly label it as "A shortcut to the Chapter 5 Quiz" so that students know it is not a new quiz.
When you Copy or Move...
You will be given a chance to Browse (1) your course and choose any Content Area or Folder (2) into which you want to move your item.

Adding files and links
Move your mouse cursor over the "Build Content" button and you'll see a variety of choices.
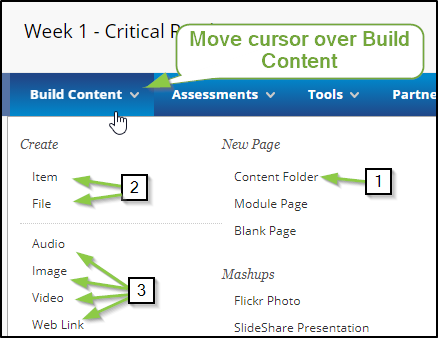
You can add items in any Content Area or Folder. Move your mouse cursor over "Build Content" and choose "Item".
Add a name and description
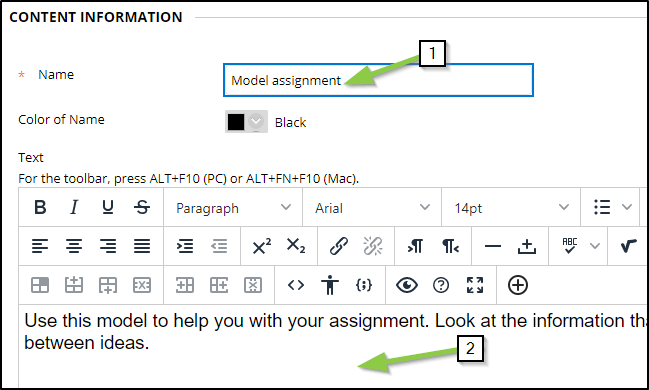
Give your Item a name (1) and enter a description or other text in the textbox (2). (Note that only the fields with orange asterisks are required.)
Add images, links, and inline attachments
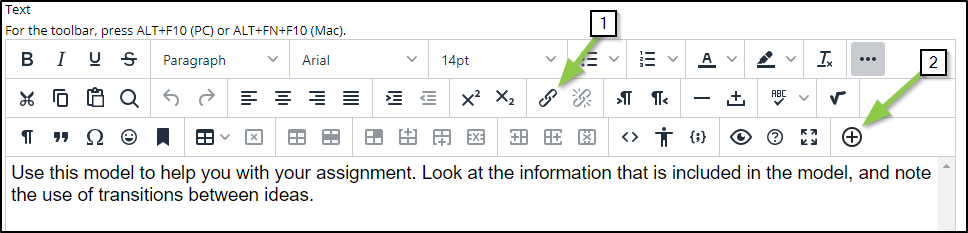
Tools in the Rich Text Editor will let you:
- Insert a hyperlink - select the text you want to be a link and then click the chain links
- Add attached files and media within your text - after clicking the button that looks like a plus, you will be able to browse your computer and add a link to an attached file that will appear directly in the text of your description.
There are a number of other editing and formatting tools as well that will likely be familiar to you
from other rich text editors you may have worked with.
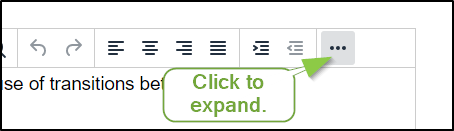
Unhide text editing tools
If you don’t see all the rows of text editing tools, you may need to click the dots on the upper right of the text editing box.
Attach Files
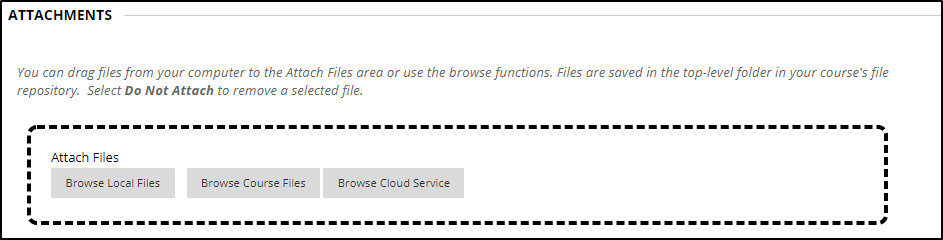
Scroll down and you can also attach one or more files to your Item.
- "Browse Local Files" lets you upload files from your computer
- "Browse Course Files" lets you attach previously uploaded files
- “Browse Cloud Service” lets you attach files from Dropbox, Google Drive, or OneDrive.
To attach additional files, simply repeat the process. The links to the attached files will appear
beneath the item name and above the description.
Restrict Availability
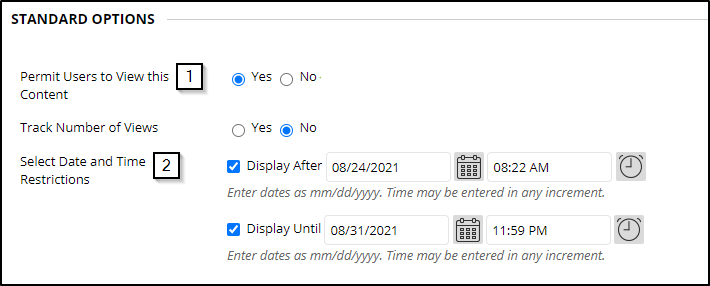
As with almost all Blackboard components you can restrict availability.
- To make the item completely unavailable - change the choice "Permit User to View this
Content" to "No". "No" means the item will NEVER be available to students. - To date-restrict the item, leave the choice as "Yes", but select times and dates you want the Item to be available.
Click Submit to finish.
Next to the name of each Blackboard component will be a drop-down menu. The button for this menu is a circle with arrow.
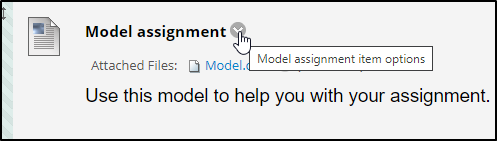
Use this menu to edit, delete, move, copy, etc. When you Edit an element you can not only change it's name or description, you can change options such as availability.
Re-order Items
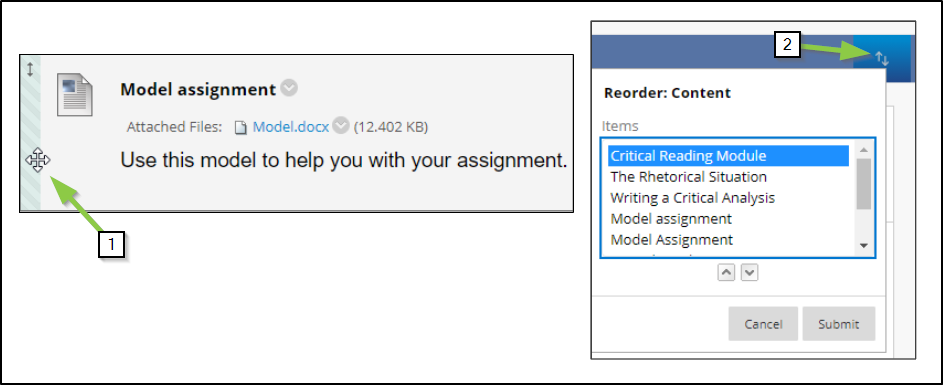
Items (and other things in the content area or folder) can be re-ordered in two ways:
- Move your mouse over the item until a cross-hair appears in the left-hand side. Then drag the Item into place
- Click on the tool in the upper right with up/down arrows. You'll see a list of all items.
Click on any to select then use the arrows below the list to move up or down.