Instructional Videos
Jump to section:
Departments

Map Campus Fileshares (PC)
How to connect to and access a UAS campus fileshare from a campus-configured Windows 10 computer.
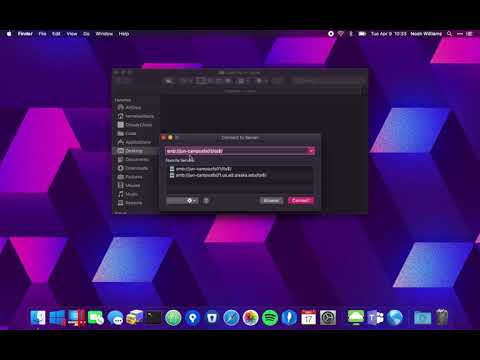
Map Campus Fileshares (Mac)
How to connect to and access a UAS campus fileshare from an Apple computer.
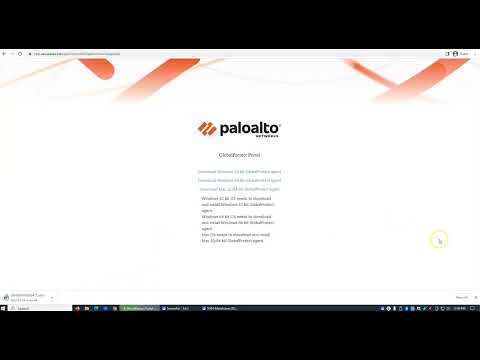
Downloading and Installing the VPN for Windows
How to download, install, connect, and disconnect from the UAS VPN for Windows.
Downloading and Installing the VPN for Windows
- Access the VPN installation page at https://vpn.uas.alaska.edu
- Sign in with your UA credentials when prompted
- Click the appropriate download link for your system: Windows 32-bit (older Windows OS), Windows 64-bit (Windows OS 10 and 11), or MacOS 32/64-bit
- Run the installation file that you've downloaded to your default Downloads folder
- Once the installation has finished, launch the GlobalProtect application
- In the server address bar, enter VPN.UAS.ALASKA.EDU< and click the Connect button
- When prompted, enter your UA Username and passphrase and click Sign In
- If prompted, sign into Duo Multifactor Authentication.
You will now be connected to the UAS-authenticated network. You can disconnect by selecting the GlobalProtect icon from your taskbar and clicking the Disconnect button.
Please contact the UAS Help Desk with any questions or need assistance with this application.
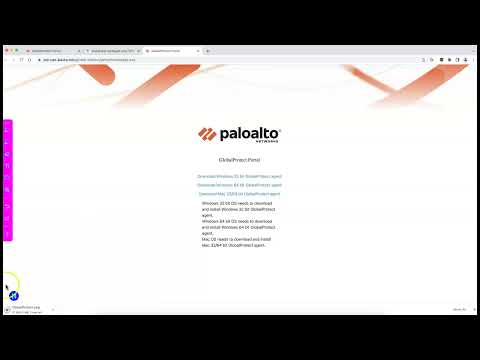
Downloading and Installing the VPN for Mac
How to download, install, connect, and disconnect from the UAS VPN for Mac.
Downloading and Installing the VPN for Mac
- Access the VPN installation page at https://vpn.uas.alaska.edu
- Sign in with your UA credentials when prompted
- Click the appropriate download link for your system: Windows 32-bit (older Windows OS), Windows 64-bit (Windows OS 10 and 11), or MacOS 32/64-bit
- Run the installation file that you've downloaded to your default Downloads folder
- Once the installation has finished, launch the GlobalProtect application
- In the server address bar, enter VPN.UAS.ALASKA.EDU and click the Connect button
- When prompted, enter your UA Username and passphrase and click Sign In
- If prompted, sign into Duo Multifactor Authentication.
You will now be connected to the UAS-authenticated network. You can disconnect by selecting the GlobalProtect icon from your taskbar and clicking the Disconnect button.
Please contact the UAS Help Desk with any questions or need assistance with this application.
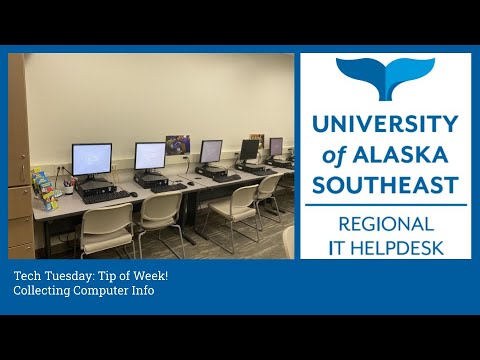
Collecting Computer Information
Spend a few minutes this week to learn how to collect valuable computer information for your inventory, both for Mac and Windows.
Collecting Computer Information
MacOS
- Click the Apple icon in the top left corner and select About This Mac
- On this page will be your Operating System version and Serial Number
Windows 10
- Open the Start menu
- Type in "CMD"
- Open the Command Prompt option that shows up
- In this new window, type "hostname" and hit Enter
- This will list your Computer's Name
- In the same window, type "wmic bios get serialnumber" and hit Enter
- This will list your Serial Number or Service Tag
- In the same window, type "wmic csproduct get name" and hit Enter
- This will list your Product Model
- This will list your Product Model
Group Security Manager
Accessing the Group Security manager channel within the UAS Online Portal.
Group Security Manager
- Log into UAS Online (https://online.uas.alaska.edu/online)
- Click Add Stuff in the upper left
- Go to Faculty/Staff
- Click Group Security Manager
- Click the Add to button (and set a tab)
- The channel will appear on your UAS Online page
Using the Group Security Manager channel
- The channel will automatically populate the groups you are authorized to manage.
- You can add accounts to either "Group (Name)" or "Group Administrators"
- Group members can see, edit, and change the services assigned to the group.
- Group Administrators can change members in the Group Security Manager
- You can add an account by entering the username in the field at the top of each section.
- You can remove accounts by clicking the checkbox next to their name, and then clicking the Remove Selected button below.
Note: make sure not to accidentally remove yourself from Administrators. If you do so, you won't have the ability to change it back!
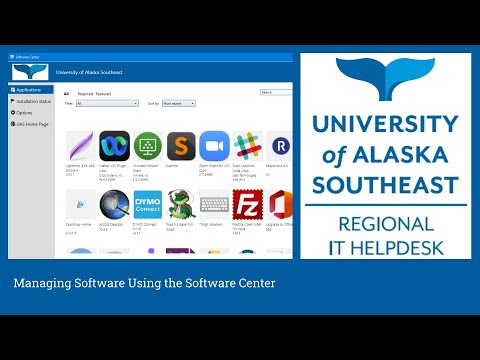
Managing Software Using the Software Center
The Software Center is an application installed on most UAS Computers to give employees more ease of access when installing and uninstalling software they require for everyday use.
Managing Software Using the Software Center
The Software Center is an application installed on most UAS Computers to give employees more ease of access when installing and uninstalling software they require for everyday use.
Coursework

Blackboard for Students
A primer on common tools for use in Blackboard, focused on student resources and needs.
Blackboard for Students
Instructions on how to navigate the Courses folders of Homework, Course Content, My Grades and Syllabus. How to see all changes made to all of your courses on the Activity Stream. Includes instructions on how to get the most out of the Grades tab.
Note: all of this options are dependent on what your teacher has set up for students to view.
Adding Images in a Blackboard Discussion Forum
A visual guide for embedding an image into a Blackboard Forum/Discussion Board post.
Adding Images in a Blackboard Discussion Forum
- Click the Add Image button to see the Insert/Edit Images screen
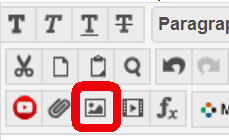
- Click Browse My Computer
- Select your image to add to Blackboard
- Try to keep your images small. (Instructions: Windows 10 or MacOS)
- Enter a Title and Description
- You can also adjust some aspects of the image from the Appearance tab
- Click Insert to finish
- To make changes, you can select the image and click the Add Image button again, or right+click and select Image
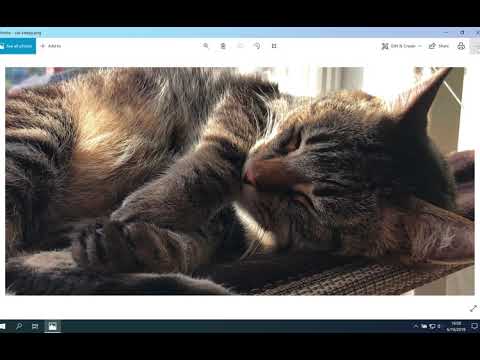
Resizing an image for posting to Blackboard on Windows 10
Windows 10 instructions for resaving oversized images for use in Blackboard posts to reduce filesize and preserve formatting.
Resizing an image for posting to Blackboard on Windows 10
Windows 10
- Open the image in the Photos app (right-click, hover over Open with > Photos).
- Click the 3-dot menu icon in the upper-right corner, then click Resize.
- Choose Best for emails and messages (2 MP).
- Save the resulting image. To avoid overwriting the file, choose a different filename such as <filename> copy in the Save dialogue.
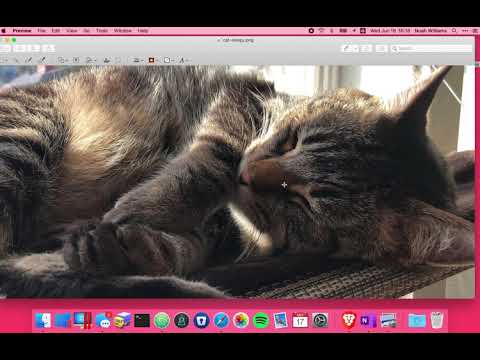
Resizing an image for posting to Blackboard on MacOS
MacOS instructions for resaving oversized images for use in Blackboard posts to reduce filesize and preserve formatting.
Resizing an image for posting to Blackboard on MacOS
MacOS
- Open your image in Preview (right-click, hover over Open With > click Preview).
- In the Menu Bar, hover over Tools > Adjust Size.
- In the Fit Into dropdown, choose 1920x1920.
- To avoid overwriting your original image, make a Duplicate file instead of saving it now:
- In the Menu Bar, hover over File, and choose Duplicate.
- A new window will pop up over the original one with a file called <filename> copy.
- Save this copy, then close Preview without saving changes to the original.
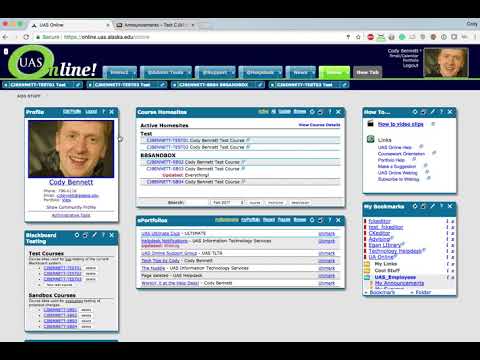
Creating a Blackboard Test Coursesite
Create a Blackboard Test course for experimentation with Blackboard functionality or upcoming changes, without affecting active courses.
Creating a Blackboard Test Coursesite
- Log into UAS Online (https://online.uas.alaska.edu).
- Access the Blackboard Testing tool
- If you don't already have it, click ADD STUFF in the upper left
- Locate the FACULTY/STAFF section
- Click Blackboard Testing
- In the new window, select the Tab you want it to appear on
- Click Add to
- Click New test/sandbox course
- Test courses are in the current version of Blackboard
- Sandbox courses are for testing upcoming changes to Blackboard
- Click the newly generated course link
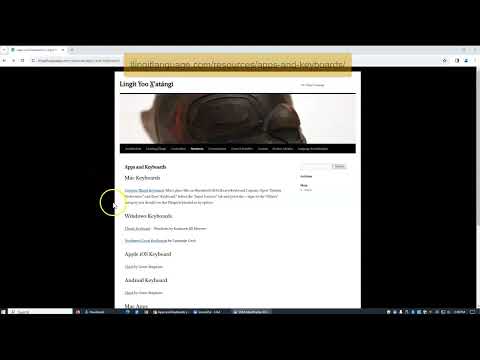
Installing a Tlingit keyboard on Windows
Windows instructions on downloading the Tlingit keyboard, activating it, and accessing the keyboard shortcuts. (written instructions)
Installing a Tlingit keyboard on Windows
This video is a guide to installing a Tlingit keyboard on a windows computer. Instructions on downloading the keyboard, activating the keyboard, and accessing the keyboard shortcuts list are included. The keyboard is downloaded at https://tlingitlanguage.com/resources/apps-and-keyboards/
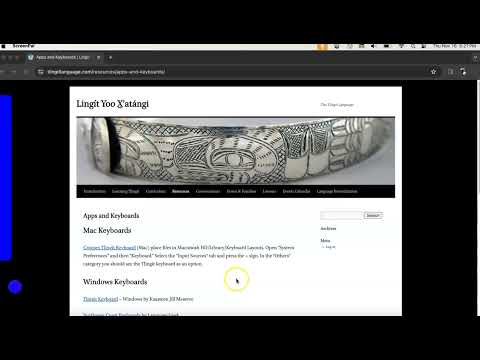
Installing a Tlingit keyboard on macOS
Mac instructions on downloading the Tlingit keyboard, activating it, and accessing the keyboard shortcuts. (written instructions)
Installing a Tlingit keyboard on macOS
This video shows where and how to download the Tlingit keyboard for a Mac device. It includes the download instructions and how to find your MACINTOSH-HD disk to place the downloaded contents. It also includes how to activate the keyboard to start using it.
Download site: https://tlingitlanguage.com/resources/apps-and-keyboards/

Tutorial on how to use ePortfolios
Tutorial on how to use ePortfolios
- Go to a course in Blackboard.
- Look for the "ePortfolio" link in the sidebar and click on it.
- Click on "Add Portfolio Item."
- Give the Portfolio Item an Item Title
- An Abstract (a small description)
- and Item Content. This could be text, images, videos, etc.
- Post the Portfolio Item.
- You can edit it
- Look at Reviews and Comments from others
- Or add a Self-reflection.
- You can also to go other classmate's ePortfolios by clicking on their name in the "Classlist" of a course in Blackboard.

Photo/Image Galleries in UASOnline's ePortfolio
Creating and editing image galleries in the UAS Online ePortfolio system, associated with Blackboard courses.
Photo/Image Galleries in UASOnline's ePortfolio
Image galleries in the UAS ePortfolio
- In your ePortfolio, select Add Portfolio Item.
- Place all of the images in a zipped folder.
- Click Add Attachment.
- Select Picture Galleries and click Next.
- Select a Mini Slideshow and click Next.
- Click Choose File, and select your zipped folder.
- Enter the Title/Caption you wish to be displayed on the Photo Gallery
- Click Upload.
- You'll be presented with a URL to link to the Photo Gallery from outside of the Portfolio.
- Click Post.
To Edit a Photo Gallery:
- Access the Photo Gallery.
- Click Edit Gallery (upper-right).
- From here you can:
- Reorder images,
- Add captions,
- Remove pictures
- Add new pictures:
- Scan for Pictures allows you to look through other Portfolio items
- Upload Picture(s) allows you to upload a new zipped folder

Forwarding your UA Email in ELMO
Instructions for students to forward their UA email to an external email address.
Forwarding your UA Email in ELMO
- Sign into ELMO (elmo.uas.alaska.edu) using option 1.
- Click on the Email destination change link (see images below).
- Select the option you would prefer your mail forward to (see images below
- Click on Save Settings.
- This setting means you will receive a copy of all emails sent to your UA account (username@alaska.edu) at the alternate address set by you.
- After changing your Email Destination, please send yourself a test message to confirm it is working. If you encounter errors, please contact the UAS Helpdesk at (907) 796-6400.
- If you no longer wish to forward E-mails, change the Email Destination back to UA Google.
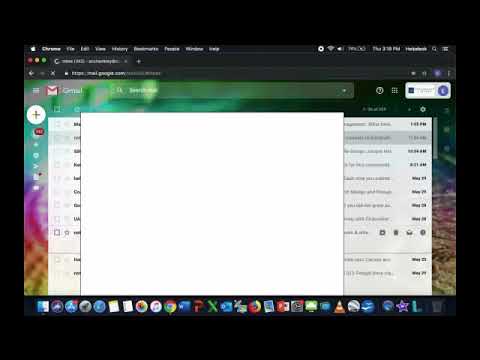
Accessing Shared Email Accounts via Google Mail
Access your shared (departmental) UA Google email accounts through google.alaska.edu
Accessing Shared Email Accounts via Google Mail
- Log into UA Google (google.alaska.edu)
- In the upper right corner, click your profile icon
- Select the shared account from the list
If you do not see your shared account listed, please confirm that you've been granted access, and clear your browser cache.
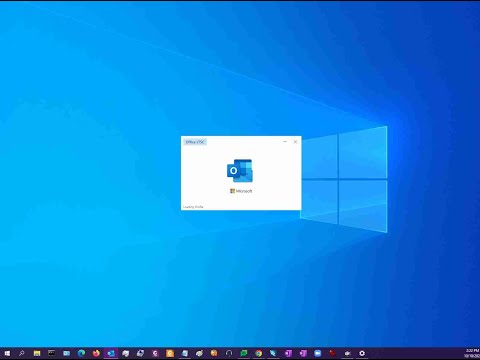
Shared Email Accounts via Microsoft Outlook
Access your shared (departmental) UA Google email accounts through Microsoft Outlook
Shared Email Accounts via Microsoft Outlook
- Ensure Outlook is closed
- Go to the Start menu > Google Workspace Sync > Add account for delegation
- Select the Outlook Google profile
- Enter the account to which you have delegated access (typically UAS_account@alaska.edu)
- Click OK
You can find your shared account folders in the left-hand column.
Webmeetings
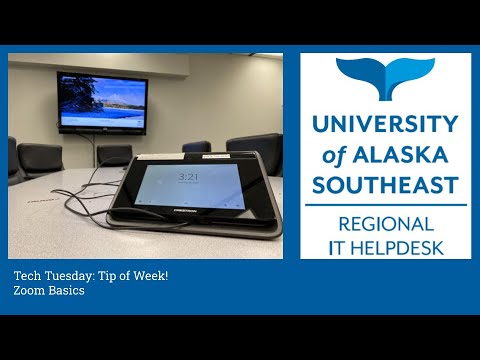
Zoom: Basics
Quick tips for first-time Zoom webmeeting users.
Zoom: Basics
Zoom First-Time Tips
- Join the meeting early. This helps make sure you're prepared before the meeting begins.
- Test your audio settings when you first join. Make sure you can both hear and be heard. If applicable, this is also a good time to check your camera.
- When you aren't speaking, make sure you are muted. Any background noise, especially if it's unexpected, can disrupt an ongoing meeting.
- There are several options to manage how you see other attendees:
- Gallery View is useful to monitor everyone in the call and keep an eye on all participants.
- Speaker View is designed to show off the current focus. It automatically tracks the attendee making the most noise, which should be the person speaking. This is a great reason to mute yourself, so you don't interrupt Speaker View.
- Hide non-video participants is great if you only want to see other people's faces. It skips the folks who don't use their camera. This can also be used in combination with the other two views.
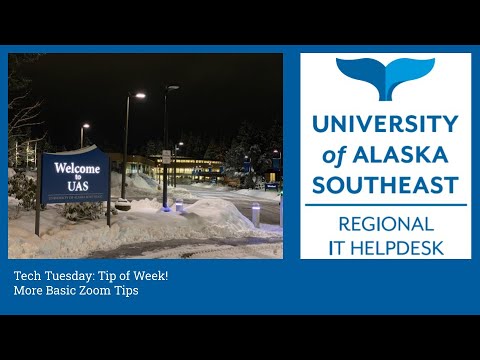
Zoom: More Basics
Further tips for improving your Zoom webmeeting experience.
Zoom: More Basics
More zoom Tips
- You can communicate with others in your Zoom meeting without using your microphone.
- Using the Chat tool is an easy way to communicate. You can send a message to everyone in the meeting, or you can choose to privately message one other user.
- Using reactions is another great way to make communication simple and easy. Reactions come in the form of an emoji for a quick and fun form of communication.
- Get an idea of your connection quality to other users with the connectivity indicator at the bottom left of a participant's video feed.
- The connectivity indicator will change color based on the quality of the connection to that participant. You may also be given the following message: "Your internet connection is unstable".
- To help improve the overall connection quality of the Zoom meeting, the meeting host can mute all participants.
- At the bottom of the participant's window, the host can find the option to Mute All participants. They can then use the menu at the bottom right of the participant's window to ask all participants to unmute.

Zoom: Backgrounds and Filters
How to use Zoom backgrounds and filters for fun or privacy.
Zoom: Backgrounds and Filters
Enable virtual background or filters on your Zoom Profile:
- Sign in at alaska.zoom.us
- Go to Settings
- Select In-Meeting (Advanced)
- Turn On Virtual background and Video filters
- Check the box to Allow the use of videos for virtual backgrounds
To use virtual background or filters in the Zoom App:
From within the Zoom app:
- Click the Setting cog in the upper-right
- Select Background & Filters
If you have a greenscreen, check the box next to "I have a greenscreen" to improve video quality - You can:
- Click on a background to use it
- Upload new images or videos by clicking the Plus on the right
- Select Video Filters to select from the filter options
You can also change your settings mid-meeting by clicking on the arrow next to Start/Stop Video from the Zoom menu, and selecting Choose Virtual Background.
General Tips

Password Management
Password Management
Do:
- Change passphrases regularly
- Use short, unusual phrases as passphrases (GolfClubToTheLifeSupport)
- Use phrases that are easy to remember but too embarrassing to share
- Turn a phrase into an acronym ("UAS is a great place to work" to Uiagptw)
- Use a combination of capital and lowercase letters, numbers, and symbols
- Replace letters with numbers or symbols (a to @ or i to !)
Don’t:
- Use patterns in passphrases (ABC or 123)
- Use personal information (birth dates or addresses)
- Share passphrases with anyone
- Reuse passphrases for multiple accounts
- Keep written passphrases near your computer
- Use the “remember passphrase” option in browsers
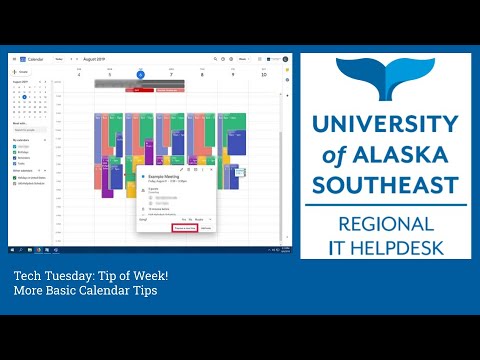
Calendar Tips
Some calendar tips to help you keep organized during school, work, and life.
Calendar Tips
Google Calendar
- From a browser, navigate to the Google homepage (Google.com)
- Click on the Apps menu in the upper right
- Select Calendar
Microsoft Calendar
- From a Windows computer, open the Start menu from the lower left
- Select Calendar from the Apps list
- If you don't see Calendar on the list, start typing "Calendar" to search for the application
Using the calendar
- To create an event, navigate to the date of the event you intend to schedule
- Click on the time of the event
- Fill in the information prompts, including clicking More options (Google) or More Details Microsoft
- Google: title, type, time, guests, Google Meet integration, location, notifications, calendar, availability, description
- Microsoft: availability, reminder, event name, calendar, location, time, description
- When you've filled in all the information you need, click the Save button
- If you need to make changes, return to the calendar, click the event, and click Edit (Google) or the title (Microsoft)
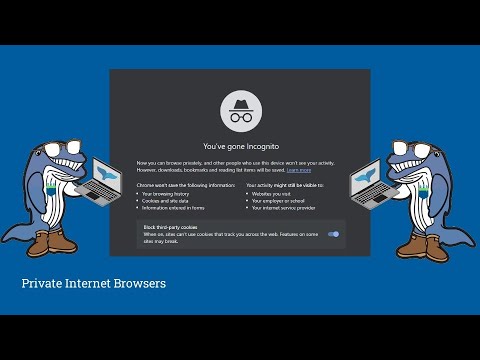
Private Browsing
How to open and use Private or Incognito browsing windows.
Private Browsing
- A private browsing window won't save your history and prevents the websites you visit from tracking your browsing.
- These windows can be used to troubleshoot problems you might find yourself with on your browser.
- Private browsing windows are easy to access from your browser of choice.
- Microsoft Edge: the three horizontal dots at the top right of the browser will open the menu. From there you can open an InPrivate window.
- Google Chrome: the three vertical dots at the top right will open the menu. From there you can open an incognito window.
- Mozilla Firefox: the three horizontal lines at the top right will open the menu. From there you can open a Private Window.
- Safari: at the top left, click File. From there you can open a Private Window.
Stay Up to Date: Windows
A guide to updating your Windows computer.
Stay Up to Date: Windows
This video includes instructions on checking if your Windows device is up to date and how to update it if needed.
Stay Up to Date: Mac
A guide to updating your Mac computer.
Stay Up to Date: Mac
This video includes instructions on checking if your Mac device is up to date and how to update it if needed.

Stay Up to Date: Chromebook
A guide to updating your Chromebook.
Stay Up to Date: Chromebook
This video includes instructions on checking if your Chromebook is up to date and how to update it if needed.

Cybersecurity: Social Engineering
Learn more about social engineering and how to keep yourself secure against malicious communication.
Cybersecurity: Social Engineering
Learn more about social engineering and how to keep yourself secure against malicious communication.